Slide after slide, photo after photo you add to your iPhone's camera roll. But what if you want to do more with your images than simply post them online? What if you want to get creative?
What is the art of overlaying photos?
So, why do people do it? Many love to overlay photos because it allows them to be creative and express their feelings in a more artistic way. It is also a great way to share your ideas with others and to make new friends.
Overlaying pictures is an interesting solution for making your shots more expressive. It's also a perfect way to add some personal touches to the photos and make them look more stylish. Many famous people who are well-known for their art use this technique to make their pictures more attractive. But how do you overlay pictures? In this article, we will show you how to use the best apps for overlaying photos on iPhones and iPad. Let's get started!
Can you layer pictures on iPhone?
There are several methods of overlaying pictures on iPhone, but the most common one is to use an app. There are many apps that allow you to overlay photos, but not all of them are created equal. In this article, we will recommend the best apps for overlaying photos on your iPhone or iPad. Let's get started!
Method 1: Overlaying with PhotoLayers
The first method we're going to show you is how to overlay pictures using the PhotoLayers app. This app is available for both iPhone and iPad and it's designed to make your life easier when it comes to dealing with layers.
To start, open the PhotoLayers app and select the background layer. You can either choose an existing photo from your camera roll or take a new one. Once you've selected the background layer, tap on the "Layers" button at the bottom of the screen. This will open up a new menu with all the available layers.
Tap on the "Add Layer" button and select the photo you want to use as the top layer. You can add as many layers as you want and rearrange them by dragging them up or down. When you're happy with the results, tap on the "Share" button and choose how you want to share your creation.
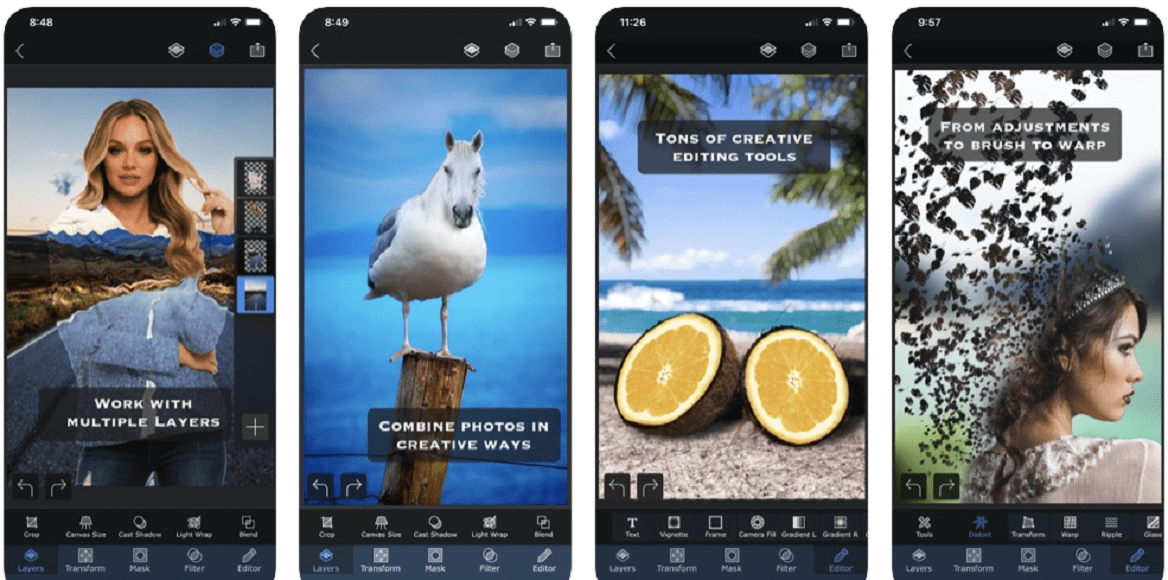
Method 2: Overlaying with Superimpose
The next method we're going to show you is how to overlay pictures using the Superimpose app. This app is only available for iPhone, but it's one of the most popular apps for overlaying photos. So, first, you have to download the Superimpose app from the App Store. Once you have it installed on your phone, open it up and select the two images that you want to overlay.
You can either choose pictures from your camera roll or take new ones using the built-in camera feature. After you've selected the two photos, they will be imported into the app and placed on top of each other.
Now, you can use the slider tool to adjust the transparency of each picture. This will allow you to see both pictures at the same time and position them how you want them. Once you're happy with how they look, you can save the image to your camera roll or share it online.
Method 3: Overlaying with TouchRetouch
The last method we're going to show you is how to overlay pictures using the TouchRetouch app. This app is only available for iPhone, but it's a great option if you want to remove objects from your photos. To begin with, this app, select the photo you want to edit and then tap the "Edit" button. Next, tap the "TouchRetouch" button and then use your finger to select the area of the photo you want to remove. The app will automatically remove the selected area from the photo.
If you want to add an object to the photo, tap the "Add Object" button and then use your finger to select the area where you want to add the object. The app will automatically add the selected object to the photo. You can also use the TouchRetouch app to clone objects in your photos. To do this, tap the "Clone" button and then use your finger to select the area where you want to clone the object. The app will automatically clone the selected object in the photo.
This app is a great option if you want to remove objects from your photos or add objects to your photos. The app is available for iPhone and it's free.
Can you overlay pictures on iPhone without an app?
If you don`t want to use apps to overlay pictures on your iPhone, you can use the Markup tool in the Photos app.
Launch the Photos app on your iPhone and open the image you want to edit. Tap the Edit button at the top right of the screen. Tap the three dots at the bottom right of the screen and choose Markup from the menu that appears. Tap the + button at the bottom left of the screen and select Add Image from the menu that appears. Choose the image you want to overlay from your Camera Roll or Photo Library and tap Choose. You can now resize or move your overlay image by tapping and dragging it with your finger.
So, without an app from AppStore you can simply use the Photos app on your iPhone. This is not an exhaustive list of apps that can be used to overlay pictures on your iPhone. The AppStore offers a variety of apps that can be used for this purpose.
What about Photoshop?
In case you decided to overlay pictures with Photoshop on your computer we have a separate guide for that.
So, first, start with opening both images in Photoshop. Select the Move Tool from the toolbar or use the shortcut key (V).
With the Move Tool selected, click on the image and drag it over to the other image. By default, the layer will be placed above the currently selected layer in the Layers panel. If you want to change this, simply drag the layer up or down in the Layers panel until it`s in the desired position.
Now that the two images are overlapping, we need to change the transparency of one of them so we can see both images at once. To do this, go to Layer > Layer Style > Blending Options. This will open the Blending Options dialog box. Next, change the Blend Mode to Screen. This will make the image on the layer transparent so you can see the image below it.
You can also adjust the opacity of the layer to control how transparent it is. In this case, we have set the opacity to 50%. Now that we can see both images, we need to position them how we want them. To do this, simply click on one of the images and use the Move Tool to drag it into place.
Once you have both images positioned how you want them, you can save the image as a PSD file or export it as a JPEG.
Are there any rules on how to overlay photos?
There are no specific rules on how to overlay photos. However, there are a few things to keep in mind when overlaying photos. First, make sure the images you are overlaying are the same size. Second, make sure the images you are overlaying have similar colors. Third, make sure the images you are overlaying have similar brightness levels.
Fourth, make sure the images you are overlaying have similar contrast levels. Fifth, make sure the images you are overlaying have similar saturation levels. Sixth, make sure the images you are overlaying have similar sharpness levels. All these factors will help to create a more seamless and realistic-looking image when overlaying photos.
How to overlay pics in a stylish way?
There is another moment when trying to figure out how to overlay pictures. It is about the style you choose for your picture. As it was already mentioned, there are no specific rules but still, some styles are more popular than others. The most used and trendy styles are light leaks, gradients, geometric shapes, patterns, textures, and solid colors.
Light leaks are usually added to create a vintage look or to make the image look like it was taken with an old camera. Gradients are often used to add a pop of color or to change the overall tone of the image. Geometric shapes can be used to add interest or to create a certain shape in the image. Patterns and textures can be used to add depth and dimension to an image. Solid colors can be used to change the background color or to add a border.
When overlaying pictures, you can also use more than one image. This is a great way to create a collage-style image. To do this, simply select multiple images in the Layers panel and drag them all into place. You can then adjust the transparency of each layer to create a unique and interesting image.
What to avoid when overlaying photos?
When overlaying photos, there are a few things to avoid. First, avoid using images that are too small. Small images will not provide enough detail and will look pixelated when overlayed. Second, avoid using images with different aspect ratios. Images with different aspect ratios will not line up correctly and will create an uneven image.
Third, avoid using images with different color profiles. Using images with different color profiles will cause the colors to shift and may create an undesirable effect. Fourth, avoid using images with different resolution levels. Using images with different resolution levels will cause the image to appear blurry or pixelated. Also, be sure to avoid using images with a lot of noise. Noise will make it difficult to blend the images together and may create an undesirable effect.
Overlaying photos is a great way to create unique and interesting images. By following the tips above, you can ensure that your images turn out looking great. So go ahead and experiment with overlaying photos and see what you can create!
How can you make a photo look more interesting?
There are many ways to make a photo look more interesting. One way is to overlay it with another photo. This can create a unique and interesting image. Another way is to change the background color or add a border. This can help to change the overall tone of the image. You can also add geometric shapes, patterns, textures, or solid colors. This can help to add interest or depth to an image. Finally, you can use light leaks, gradients, or noise to create a vintage or artsy look. Experiment with different techniques and see what you can come up with.
Also, you can try different filters and editing tools to make a photo look more interesting. Many photo editing apps offer a variety of filters and tools that can help to change the look of a photo. Experiment with different apps and see what you can come up with. Who knows, you may even discover some new favorite editing techniques.
So go ahead and get creative with your photos. Overlaying, changing the background, adding borders, or using filters can help to make a photo look more interesting. Have fun and see what you can come up with!
Bottom line
Your iPhone is a great tool for taking and editing photos. By learning how to overlay pictures on iPhone, you can create unique and interesting images. Overlaying photos is a great way to add depth, dimension, or interest to an image. It can also help to change the overall tone of the image. Experiment with overlaying photos and see what you can create!