If you're a photographer, chances are you've heard of Adobe Lightroom. Lightroom is a powerful photo editing tool that allows you to make global changes to your photos with just a few clicks. And one of the best things about Lightroom is its ability to batch edit photos.
What is batch editing?
Batch editing is a great way to save time when you have a bunch of photos that need similar edits. For example, let's say you have a group of photos that were all taken in the same location but at different times of the day. You could spend hours individually editing each photo to match the others, or you could simply batch edit them and be done in minutes.
The batch editing feature in Lightroom Classic CC gives you the ability to make edits to several pictures at once. So that group of photos we mentioned before? You can easily fix the white balance, exposure, and other settings for all of them at once. And if you need to make any further adjustments, you can always go back and edit each photo individually.
This is a very useful tool because many photographers take their photos in RAW format. RAW files are larger and take up more space, but they offer much more flexibility when it comes to editing. However, this also means that each individual RAW file can take longer to edit. Batch editing allows you to make your global changes quickly, and then you can go back and fine-tune each photo if needed.
So, here is a thorough guide on how you can batch edit your photos and save a lot of time and energy!
How to batch edit in Lightroom?
There are several variations on when you can start batch editing in Lightroom. You can either select all the photos you want to edit at once and then make your changes, or you can start making changes and then choose which photos to apply them to.
In Library Module
Click the Import button and choose all of the photographs you wish to batch edit together for general import to your Library. After you've imported your entire photo collection into your library, you may now work with it in smaller groups. Select all the photos you want to work on in the Library module and click "Edit In…" from the drop-down menu. You can also Right Click on a photo and choose "Edit In…"
Repeat the above procedure as needed for as many custom groups of photos as you wish, each with its own set of requirements. It's important to remember that you are editing photos not just changing settings. So, when you start a new batch, you will likely want to use the same or similar settings as your previous batches.
During import
Click on the Import button in the lower left corner of Lightroom after it has been opened. You'll find options for going to various photo folders and external drives along the left side of the Import module once it's open. Find the photos you want to import into Lightroom and click on them so they're highlighted.
To edit your photos during the import process, make sure you check the "Enableduring import" box in the upper right corner of the Import module. This will allow you to make changes to your photos as they're being imported into Lightroom.
From here, you can begin making changes to your photos. The most common edits that are made during import are cropping, straightening, and adjusting the white balance. To crop a photo, click on the Crop tool in the toolbar at the top of the window. To straighten a photo, click on the Straighten tool and then click and drag along a horizon line or other straight object in the photo. To adjust the white balance, click on the White Balance tool and then click on an area of the photo that should be neutral gray.
After you've made your changes, you can either click the Import button to apply them to all of the photos you're importing, or you can click the Cancel button to close the Import module without making any changes.
'Copy' settings to another photo
Choose a photo from the collection you just uploaded to your library module, and edit it using the Develop tools in the right panel (or an automatic preset). When you're done, click "Copy" on the left side of the interface. Doing so will open up a new internal window with that photo's edit settings listed. Check off the ones you want and hit "copy."
After it, open another photo you want to have those settings and go to "Edit" in the top menu, then "Paste Settings." A pop-up window will appear asking you which settings you'd like to paste. You can also hit "select all" if you want every change to be applied.
Voila! The photo should look exactly the same as the one you first edited. If it doesn't, that means the setting wasn't successfully copied (or that there's another edit already present that's overriding the new one).

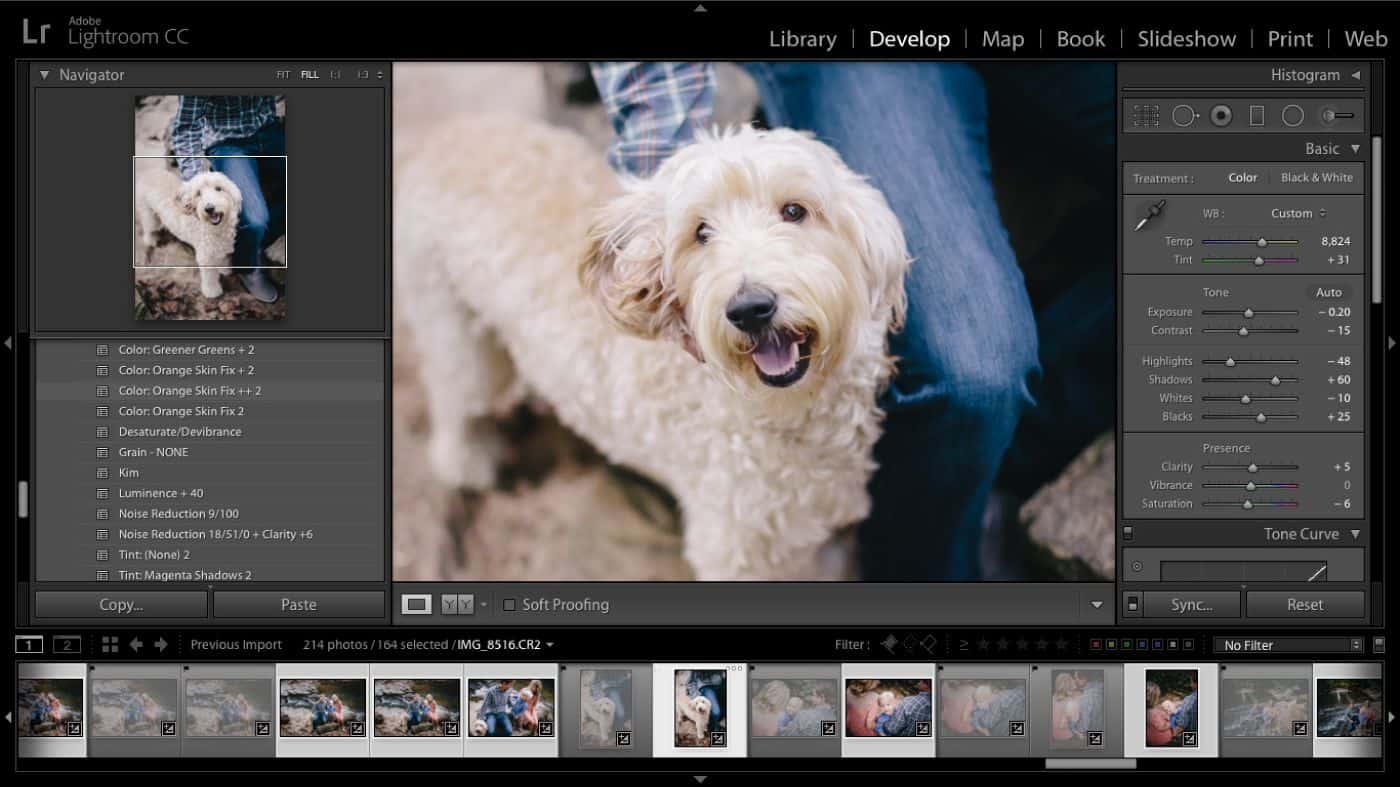
Synchronize edits across all photos
Select a photo in the Library module and click "Sync" in the right panel (or hit "S" on your keyboard). Doing so will open up a new window with checkboxes next to every editable setting in Lightroom. Check the ones you want to be applied to all of the photos you select, and hit "synchronize." It allows you to make changes to multiple photos at the same time. However, this method only works if the photos you're trying to edit have similar lighting conditions and are otherwise pretty similar. Otherwise, the results will look bad. So use it with caution!
Batch editing in Lightroom is a great way to save time when you have a lot of photos that need to be edited. It's also a great way to ensure that your photos have a consistent look and feel. So get out there and start batch editing!
With all these methods you will find the one that suits your needs the best and will save you a lot of time in your photo editing workflow. Be sure to check out our other articles on Lightroom for more tips and tricks!
Can I do it with Meta Data?
In case you are a professional photographer and are using Adobe Photoshop Lightroom for all your image management tasks, you will sometimes have the need to batch edit the metadata of several files at once.
There might be different reasons for this: for example, you shot a series of portraits and want to add the name of your client to each image's IPTC data. Or you want to add a copyright notice or your website URL to a bunch of images that you are about to upload to a stock agency.
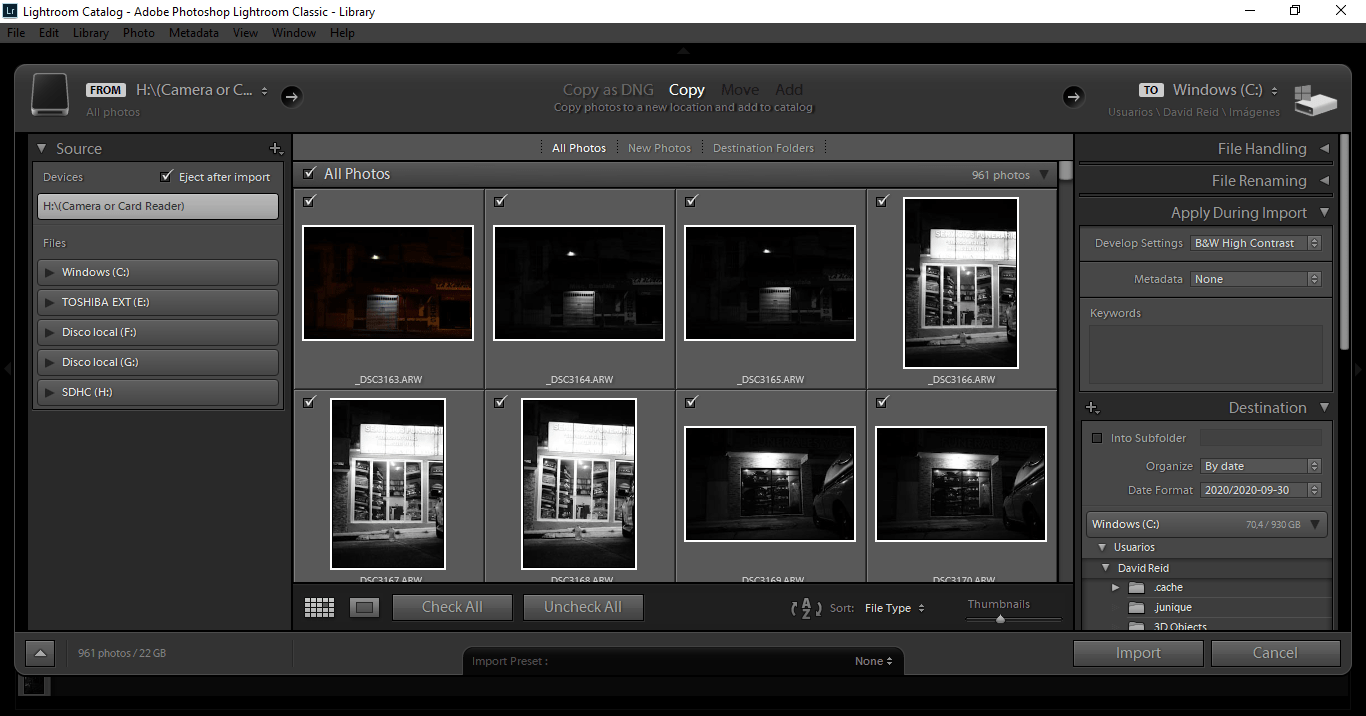
Lightroom's Metadata panel offers a convenient way to batch edit metadata. You may batch edit metadata in the same way as you did in Method 1 above, by importing all of the photographs you wish to modify and then selecting them from the grid view of the Import module.
After that, all you have to do is scroll over to the "Apply During Import" box on the right and select "New" under the Metadata bar. This will bring up a big window for all sorts of metadata choices. You can enter whatever data you want in the appropriate fields, and when you're done simply click "OK." All of this data will now be applied to every image you selected.
Of course, you can also batch edit metadata after you have already imported your photos. Just select the images you wish to modify from the Library module's grid view and then go to the Metadata panel on the right. Here you can enter all the data you want and it will be applied to every image you have selected.
This method is pretty convenient if you want to enter the same data for a bunch of images, but what if you want to enter different data for each image? This is where the next method comes in handy.
What are some tips on batch editing photos?
There are a few things to keep in mind when batch editing photos:
- Be sure to choose similar photographs that will benefit from the same edits. Batch editing won't work well if you're trying to edit a portrait and a landscape together, for example.
- When copying and pasting edits, be sure to pay attention to the settings that are being copied. You don't want to accidentally copy something that you don't want to paste!
- If you're not sure what a setting does, be sure to check out the Lightroom documentation or some online tutorials. There's no sense in blindly copying and pasting settings if you don't know what they do!
- And as always, save your originals! Lightroom is non-destructive, so you can always go back and start again if you don't like the results of your batch edits.
We hope these tips have been helpful! If you have any questions, be sure to leave a comment below. And don't forget to subscribe to our newsletter to get the latest news, tutorials, and special offers delivered straight to your inbox!
Final words
As a photographer, you know that time is money. So anything you can do to save time in your workflow is worth its weight in gold! We hope that this article has helped you to understand how to batch edit in Lightroom and that you will find it to be a valuable tool in your post-processing arsenal.